Custom Model Training Using YOLOv3 and Darknet (in Colab)
Object detection Using OpenCV made easier...

A Software Developer with a multifaceted work Experience of 1+ years of developing software applications with prowess in the field of web development and Machine Learning. Interested in AI, Web Designing, and DevOps. I am proficient in java, python, C, JavaScript, and frameworks like Flask, ReactJs, and Django. An open-source enthusiast, always ready to collaborate and create state-of-the-art software designs that directly impact society.
Question: Why custom model training?
---> There are a wide variety of ML/DL models out there that we can use for our use cases. But, sometimes we encounter various peculiar problems that force us to think out of the box, develop our own logic and mathematical models & train them on the dataset to achieve the task at hand.
Some Basic Terms:
YOLOv3 - YOLOv3 (You Only Look Once, Version 3) is a real-time object detection algorithm that identifies specific objects in videos, live feeds, or images. The YOLO machine learning algorithm uses features learned by a deep convolutional neural network to detect an object. Versions 1-3 of YOLO were created by Joseph Redmon and Ali Farhadi, and the third version of the YOLO machine learning algorithm is a more accurate version of the original ML algorithm.
Darknet – Darknet is an open-source neural network framework written in C and CUDA. It is fast, easy to install, and supports CPU and GPU computations. More info. On Darknet - GitHub.
Model Training - A machine learning training model is a process in which a machine learning (ML) algorithm is fed with sufficient training data to learn from. The training model is used to run the input data through the algorithm to correlate the processed output against the sample output. The result from this correlation is used to modify the model.
---> Custom Model training can be used for a wide variety of use cases such as Object detection, video analytics, Natural language processing, etc. In this article, I am focusing on the Object detection stream and will present the step-by-step procedure of training a custom object detection model on "Weapon Detection". The dataset consists of 4 classes of weapons i.e Assault rifles, Grenades, Knives, and Pistols. Once the model is trained and the results are satisfactory, it can be integrated with any app for further use.
Pre-requisites for training custom model:
Precisely Annotated Dataset
Dataset uploaded on Google drive.
Downloaded pre-trained weight file and config file for YOLOv3.
Some basic understanding of data preprocessing such as train-test splits.
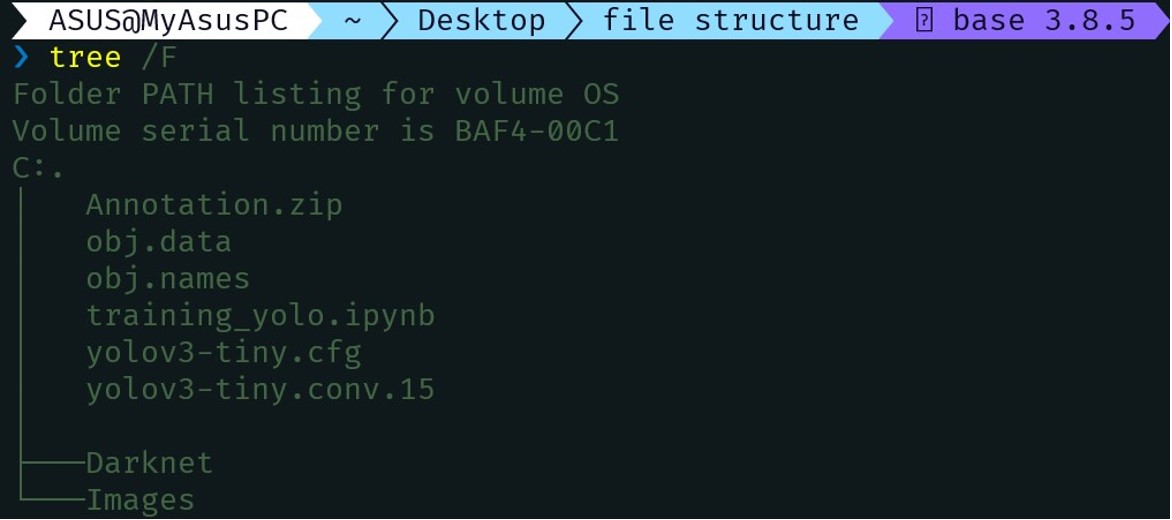
File Structure Before Training –
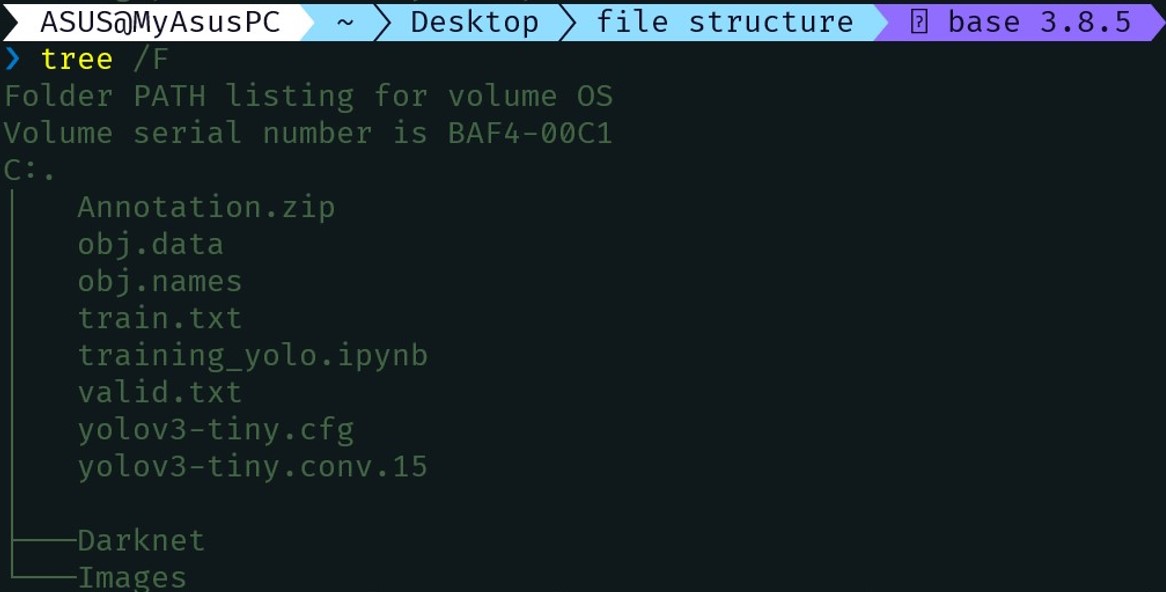
File Structure After Training -
Steps to train a custom model:
A. Initial Steps:
Create a folder on google drive and upload the dataset in the folder in zipped format.
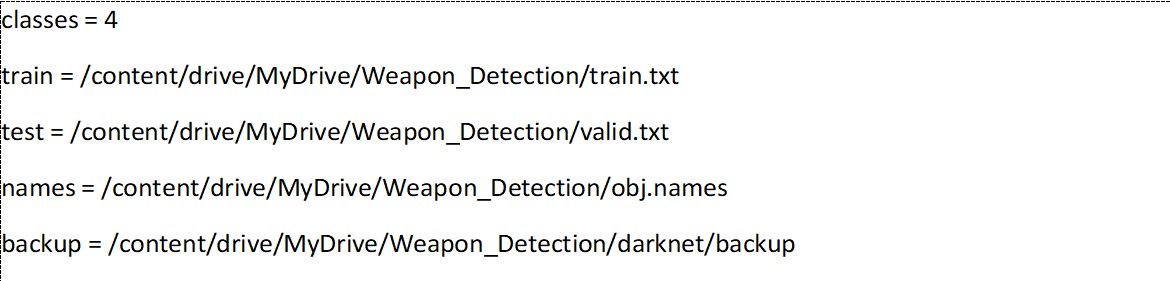
Create “obj.data” and “obj. names” files and add the data regarding the number of classes and the paths of train and text files that we will create in the future.
Upload the weight and config file for YOLOv3 to the project folder.
Create an “Images” folder in the main project folder to store the unzipped images and annotations.
B. Preparation Steps:
Create a Google Colab file and open it from the drive.
Mounting drive: This step establishes a connection between the google Colab file and the drive.
from google.colab import drive
drive.mount('/content/drive')
- Unzipping data: This step unzips all the images and annotations that will be fed to the model.
!unzip '/content/drive/MyDrive/Weapon_Detection/Annotation.zip' -d '/content/drive/MyDrive/Weapon_Detection/Images'
- Darknet: In the main project folder, clone the darknet repository which is the core component of the custom model training practice.
!git clone https://github.com/AlexeyAB/darknet/
- Move to the darknet directory and install the latest version of CUDA and check for the correct installation of OpenCV and CUDA.
!/usr/local/cuda/bin/nvcc --version
- Make command: Use the make command to build a file containing the completed program, which is then called a target file. It uses information from a description file created by the user.
!make
- CHMOD command: Use the “chmod” command to change the access mode of a file. In this case – darknet.
!chmod+x darknet
- Change the directory to the Images folder and check for the format of the image. YOLOv3 accepts images only in the “.jpeg” format. We run some scripts to check if all images are in the required format and if not, we convert them.
import os
import glob

directory=  "/content/drive/MyDrive/Weapon_Detection/Images"
os.chdir(directory)
files=glob.glob('*jpeg')
print(len(files))
directory=  "/content/drive/MyDrive/Weapon_Detection/Images"
os.chdir(directory)
files=glob.glob('*jpg')
print(len(files))
for filename in files:
  prefix = filename.split(".jpg")[0]
  os.rename(filename,prefix+".jpeg")
C. Training Steps:
- Train-Test-Split: This step splits the initial data into two sets namely train and test so that we can train our model on one set and validate on the other set. The test set is usually 10/20 % of the original data.
import glob
import os
path = "/content/drive/MyDrive/Weapon_Detection"
os.chdir(path)
current_dir = "/content/drive/MyDrive/Weapon_Detection/Images"
# Percentage of images to be used for the valid set
# Create train.txt and valid.txt
percentage_test = 10
file_train = open('train.txt', 'w')
file_test = open('valid.txt', 'w')
counter = 1
index_test = round(100 / percentage_test)
for file in glob.iglob(os.path.join(current_dir, '*.jpeg')):

  title, ext = os.path.splitext(os.path.basename(file))
  if counter == index_test:
    counter = 1
    file_test.write(current_dir + "/" + title + '.jpeg' + "\n")
  else:
    file_train.write(current_dir + "/" + title + '.jpeg' + "\n")
    counter = counter + 1
print("done")
- Change the directory to the Darknet folder in the main project so we can start our training.
import os
os.chdir("/content/drive/MyDrive/Weapon_Detection/darknet")
Before the training step, we activate our GPU in google Colab as it will help in faster computations. We do this at the end because of the time constraints we have to use the GPU. We also need to comment out the darknet cloning step and the data unzipping steps while re-running the file.
Model Training: We feed our model the config file, pre-trained weights file, and the “obj.data” file along with some parameters.
!./darknet detector train /content/drive/MyDrive/Weapon_Detection/obj.data /content/drive/MyDrive/Weapon_Detection/yolov3-tiny.cfg /content/drive/MyDrive/Weapon_Detection/yolov3-tiny.conv.15 -dont_show -ext_output -map -clear
Important changes to be made in some files before training:
- obj.data file: Include the number of classes concerning your model. Maintain the relative paths of 4 files i.e. train, test, names, and backup.
- obj. names file: Include the name of the classes used in your model

YOLO config file:
A. Classes: Change the number of classes in the YOLO layers according to your project.
B. Max Batches: The general formula used to calculate this is,
(Number_of_Classes * 2000)C. Filters: Change the filters in the YOLO layers according to the number of classes used in your project. The general formula used is,
(5 + Number_of_Classes ) * 3
Testing the Results:
Once the training is done, the Mean Average Precision (MAP) for every 1000 iterations is stored in the backup folder of the darknet directory.
In the same location, the last_weights, final_weights, and, the best_weights of the model are stored that can be directly used to test the accuracy of the model.
Conclusion:
YOLOv3 proves to be one of the best choices for developing and training a custom model as it is an end-to-end object detection mechanism. It has the advantages of detection speed and accuracy and meets the real-time requirements for several use cases along with a lightweight architecture